This card is made from Real Red cardstock, cut at 3 inches by 6 inches and scored at the 3 inch mark on my Scor-Pal (love that tool) and folded to make a 3x3 card. I then punched a Giga scallop square in Whisper White. The embossed red layer (1 and 7/8 inches square) was done by using my Cuttlebug with the heart texture plate from Fiskars. It turned out so cute! I then stamped the For You With Love stamp from the Riveting set by Stampin' Up! in Real Red classic ink and punched it out with the 1 and 1/4 inch circle punch. The three layers were adhered together with adhesive, and the whole thing was attached to the card base with dimensionals. Finally, I tied a piece of red gingham ribbon from American Crafts around the card front using Kristina's method. Simple and cute, and QUICK! Thanks for peeking in...
Thursday, January 10, 2008
Valentine's Day
I've been seeing a bunch of Valentine's Day cards on Splitcoast and various blogs I frequent. I just love the 3x3 inch card size for valentines, and was inspired by Kristina Werner's blog recently to make one.

This card is made from Real Red cardstock, cut at 3 inches by 6 inches and scored at the 3 inch mark on my Scor-Pal (love that tool) and folded to make a 3x3 card. I then punched a Giga scallop square in Whisper White. The embossed red layer (1 and 7/8 inches square) was done by using my Cuttlebug with the heart texture plate from Fiskars. It turned out so cute! I then stamped the For You With Love stamp from the Riveting set by Stampin' Up! in Real Red classic ink and punched it out with the 1 and 1/4 inch circle punch. The three layers were adhered together with adhesive, and the whole thing was attached to the card base with dimensionals. Finally, I tied a piece of red gingham ribbon from American Crafts around the card front using Kristina's method. Simple and cute, and QUICK! Thanks for peeking in...
Labels:
Card Designs
Sunday, January 06, 2008
Tissue Holders - Complete!
As I spoke about in my last post, I have joined the 25 Weeks of Christmas Yahoo! group. Our project goal for this month is to make at least six travel tissue covers. Well, we have several patterns to choose from, all different dimensions. I picked one last week which turned out to be too big, because the pocket tissues I bought were a different brand that what the pattern designer used, and the tissues were SWIMMING inside...and I made THREE before I learned this lesson. Sigh. Here are the tissues I bought:

Well, this week I ripped apart the tissue holders I made because I really liked the fabric I used and since I was downsizing I could still use it. I am not going to post how I did it because there are numerous directions out there on the web. The pattern directions I followed were from Tracy at sewthankful.com, but I started with a rectangle six inches by seven and a half inches, and next time I make these will start with a six by seven inch rectangle, because my resulting cover is still a bit loose. Here is a finished tissue cover:

These were very fun and easy to make. I made six very quickly this evening, in under a couple of hours. I love assembly line sewing. It seems to make things go faster. I probably will make more someday, they are quick and easy gifts to make. Two fat quarters will make six covers and there are so many options with patchwork, embroidery, etc. Here are the six completed covers, with tissue packs inside. Thanks for looking!
Well, this week I ripped apart the tissue holders I made because I really liked the fabric I used and since I was downsizing I could still use it. I am not going to post how I did it because there are numerous directions out there on the web. The pattern directions I followed were from Tracy at sewthankful.com, but I started with a rectangle six inches by seven and a half inches, and next time I make these will start with a six by seven inch rectangle, because my resulting cover is still a bit loose. Here is a finished tissue cover:
These were very fun and easy to make. I made six very quickly this evening, in under a couple of hours. I love assembly line sewing. It seems to make things go faster. I probably will make more someday, they are quick and easy gifts to make. Two fat quarters will make six covers and there are so many options with patchwork, embroidery, etc. Here are the six completed covers, with tissue packs inside. Thanks for looking!
Labels:
Sewing
Tuesday, January 01, 2008
25 Weeks of Christmas
Happy New Year everyone! Hope that 2008 is a safe and happy one for all. As I said in my last post, I didn't make gifts for people this year, mostly because I procrastinated until it was just too late to start. Well this year I hope will be different. I recently signed up for a new Yahoo! group called 25 Weeks of Christmas, which a fellow Lazy Girl group member (Lish) created. It is a group designed to help support and encourage its members to get their gifts made and wrapped by December so that we can enjoy the holidays with less stress! Participation is required as there is a no lurking policy. We have small goals to meet each month (little projects etc), and by July we are ready to get our gifts we plan to give going. I'm excited because it will give me the little nudge I need to get my butt in gear.

I found a box in my sewing room that will hold the projects in it when completed (actually it is temporary because it is rather small, will upsize when the time comes). Dexter decided he would inspect the box to make sure it was appropriate. I guess he approves!

Well, wish me luck, as I have big plans to give lots of Lazy Girl bags this year! I spent five hours Friday night in my sewing room cleaning up and trying to organize, and found FOUR packages of Warm and White cotton batting (craft and baby size)...and I almost bought some last week! Just goes to show you "out of sight, out of mind" really is true. I also found lots of fabric I bought over the last year that I completely forgot about...sigh. It still looks pretty awful in there, I need CLEAN SWEEP to come in...oh wait, they make you throw out half of everything...never mind (lol)
I'm off today from work, and am getting ready to go back in the sewing room to attack the mess again. Again, Happy New Year!
I found a box in my sewing room that will hold the projects in it when completed (actually it is temporary because it is rather small, will upsize when the time comes). Dexter decided he would inspect the box to make sure it was appropriate. I guess he approves!
Well, wish me luck, as I have big plans to give lots of Lazy Girl bags this year! I spent five hours Friday night in my sewing room cleaning up and trying to organize, and found FOUR packages of Warm and White cotton batting (craft and baby size)...and I almost bought some last week! Just goes to show you "out of sight, out of mind" really is true. I also found lots of fabric I bought over the last year that I completely forgot about...sigh. It still looks pretty awful in there, I need CLEAN SWEEP to come in...oh wait, they make you throw out half of everything...never mind (lol)
I'm off today from work, and am getting ready to go back in the sewing room to attack the mess again. Again, Happy New Year!
Thursday, December 27, 2007
Reno's Christmas 2007 Sweatshirt
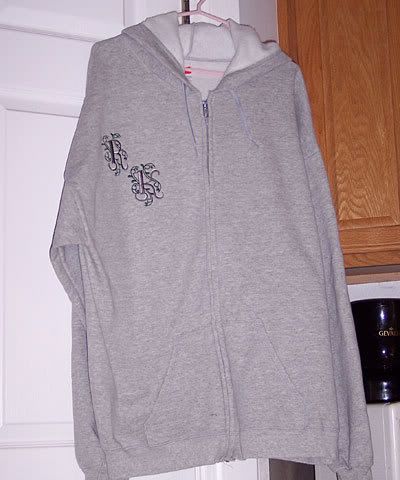
I didn't make too many gifts this year, not for a lack of wanting to, but just lack of time and energy. But my mom bought this zip up hooded sweatshirt at Target for her friend Reno a couple weeks ago, and I had an idea to embroider his initials on it.

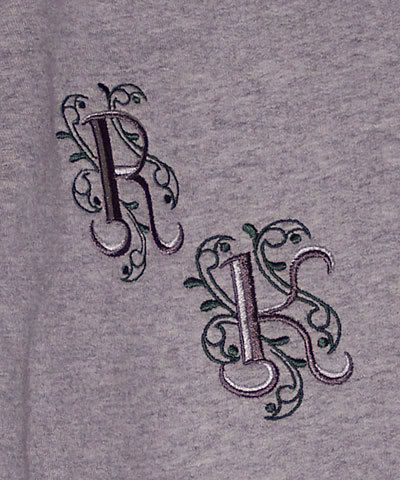
That night I got online and downloaded his initials from Embroidery Library out of the Ornate Alphabet collection. I first imported the 3 inch letters into my embroidery software and arranged them in a pleasing manner, then combined them into one file. I changed the colors to silver and green to go with the heather gray fabric. My mom helped me with the prep work (stabilizing and hooping the sweatshirt) and then we watched my Viking Designer SE (my dream machine) stitch out the R and the K. It turned out great. Here is a close up of the initials:

Reno's "initial" reaction was to laugh! What a strange response...lol but thats RENO! He did like it, and I think it made the plain sweatshirt much nicer.
That night I got online and downloaded his initials from Embroidery Library out of the Ornate Alphabet collection. I first imported the 3 inch letters into my embroidery software and arranged them in a pleasing manner, then combined them into one file. I changed the colors to silver and green to go with the heather gray fabric. My mom helped me with the prep work (stabilizing and hooping the sweatshirt) and then we watched my Viking Designer SE (my dream machine) stitch out the R and the K. It turned out great. Here is a close up of the initials:
Reno's "initial" reaction was to laugh! What a strange response...lol but thats RENO! He did like it, and I think it made the plain sweatshirt much nicer.
Labels:
Machine Embroidery
Wednesday, December 26, 2007
For Carmela
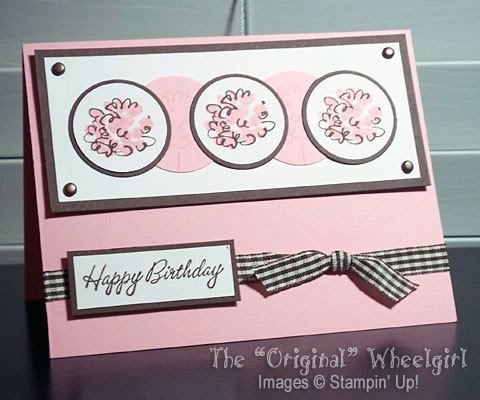
I just loved this sketch when I saw it on Splitcoast last week, but with Christmas and all I hadn't got a chance to make it. I had a great idea one morning this weekend as I lay in bed (contemplating whether to get up or not...lol) to make a pink and brown birthday card for my late brother's high school and beyond girlfriend (who is now married and has a baby boy). Greg died ten years ago, but we still keep in touch with Carmela because she meant so much to him. She's like a sister to me. Her birthday is on New Year's Eve, and I hope she likes the card.

I used the puffball on a stick stamp from the Heartfelt Thanks set by SU! and Happy Birthday from the Warmest Regards set. The colors are Pretty in Pink, Chocolate Chip and Whisper White. I found some brown gingham ribbon and added some copper brads which are as close to brown as I could get. The circle punches I used are the 1 - 3/8 and 1 - 1/4 ones. I also used my Perfect Layers tool to get a 1/16 mat on the sentiment. Pretty sweet tool. Both the focal panel and sentiment are attached with SU dimensionals. Thanks for looking!
Labels:
Card Designs
Sunday, December 09, 2007
My First Miranda Bag!
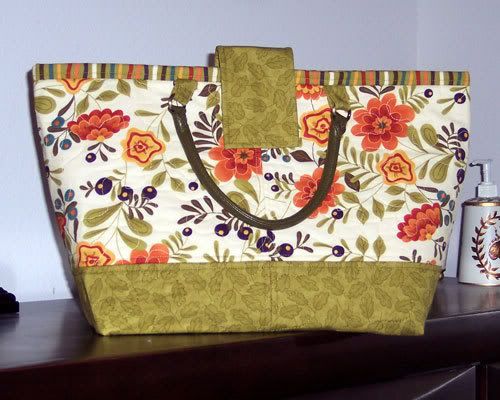
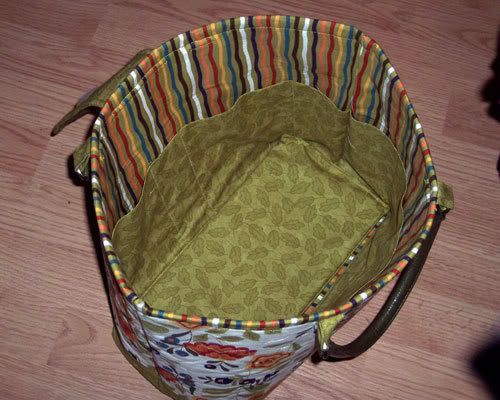
Well it took me a while only because I haven't felt like going in the sewing room for some time, but I finally finished my first Miranda bag!! It is much more involved than the Gracie bag (also by Lazy Girl Designs) but is still a simple to make bag. I used fabric from Moda's Fall Back in Time line by Sandy Gervais. I love how the striped fabric I used for the inside of the bag forms the faux binding at the top. I used the dark green vinyl handles by Exclusively You by Leisure Arts, which are a bit darker than I would like, but I think it still looks good.
Don't you just love all these cool pockets? So much organization in such a small package, although this bag turned out way larger than I expected. That is fine with me, the more room the better! This bag is super sturdy, because it uses heavy interfacing (I used Decor Bond) on both the bag and the lining. It made for some difficult turning of the bag, but once that was done, it was cake.
I love this design and will surely make another. But who knows when? I just have to find the time and pick out some new fabrics! There are so many new lines out now, and I am drooling over some of them!! Thanks for looking!
Sunday, October 21, 2007
Halloween Fun
Just a quick post to show some Halloween wraps I made using Angie's Mummy Candy Wrap Tutorial. This lady is so talented, I had to make a few of these wraps. She also has a Frankenstein wrap that I plan on doing, if I get the chance before Ween.

Also, my mom made some sliding gum wrappers that I thought were so cute I had to post a picture. She doesn't have a blog of her own (but she should, I may make one for her), so I am proud to put her work on mine. She used for most of the wraps the Creepy Crawly paper from SU!, and some ingenious cutting and punching to create the ghost, Frankie, spider, mummy, bat and skull and crossbones! Way to go Ma!
Labels:
Non-Card Projects
Sunday, October 14, 2007
Keep on Rollin!
I had contemplated getting a new desk chair. The one I have is still in good condition but the casters didn't roll well even on my laminate floor. Mom was over this weekend and took a look at them. I'll I can say is YUCK they were packed with hair and cat fur. No wonder they weren't rolling. She tried her best to cut out the hair but it was no use. So while we were out shopping we stopped at Office Depot and bought a package of new casters. Let's just say the chair rolls like marbles on glass. I'm loving it! And for a girl who is a bit of a weakling, the easier the better! LOL
Unfortunately the casters were $38 bucks, but considering a new quality desk chair is over a hundred, I think it's a bargain!
Labels:
House and Home
Wednesday, October 03, 2007
OMG! Guess who subscribed??
Wow was I surprised this weekend when I got notification that none other than Joan Hawley, the designer and owner of Lazy Girl Designs (the best bag patterns on the planet!!!), signed up to subscribe to my blog!! And I don't have hardly any sewing posts on it yet!! So Joan, this post is for YOU!!
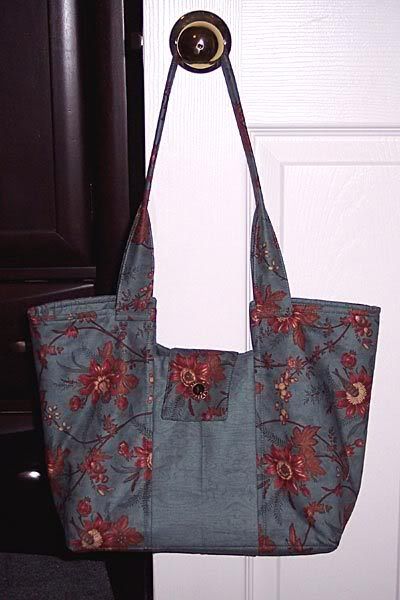
I have made three of the Gracie Bag pattern (a total favorite of mine), and this is a picture of the first. It was made from the Seneca Falls fabric line by Moda. This pattern is so easy to do. I suggest it as one that a beginner purse maker could make, no problem.

I didn't get a picture of the second Gracie I made, as I sent it off as a Christmas present for my best friend near Atlanta, GA. I just snapped this picture of the third Gracie I made, which I've had for some time. It was supposed to be a present, but I decided I liked it too much to give away!! It was made from the cream colorway of the Wuthering Heights fabric line by Moda.
The Katy Bag pattern is also a great one. I have made two of them, and here is the pink one I made last year. It was made from the rose colorway of the Wuthering Heights fabric line (yes I love MODA!) I do have some difficulty with the lining laying flat inside, but I'm sure there is something I can do about that. I made one in a chocolate brown fabric as well, but it has fabric handles. I like the sparkly jewel type handle on this pink Katy.

Joan, I CANNOT wait for the Miranda Bag to come out this month. I've already pre-ordered the pattern and all the associated parts. I'm going to make it out of the Fall Back in Time fabric line by Sandy Gervais for Moda. I will take pictures of the fabric and post later this week.
All quilters and sewers should definitely check out Joan's Lazy Girl Designs. I'm so glad I found her patterns. Her Lazy Girl Yahoo! Group is great as well. I love reading about other Lazies and what they are making.
I have made three of the Gracie Bag pattern (a total favorite of mine), and this is a picture of the first. It was made from the Seneca Falls fabric line by Moda. This pattern is so easy to do. I suggest it as one that a beginner purse maker could make, no problem.
I didn't get a picture of the second Gracie I made, as I sent it off as a Christmas present for my best friend near Atlanta, GA. I just snapped this picture of the third Gracie I made, which I've had for some time. It was supposed to be a present, but I decided I liked it too much to give away!! It was made from the cream colorway of the Wuthering Heights fabric line by Moda.
The Katy Bag pattern is also a great one. I have made two of them, and here is the pink one I made last year. It was made from the rose colorway of the Wuthering Heights fabric line (yes I love MODA!) I do have some difficulty with the lining laying flat inside, but I'm sure there is something I can do about that. I made one in a chocolate brown fabric as well, but it has fabric handles. I like the sparkly jewel type handle on this pink Katy.
Joan, I CANNOT wait for the Miranda Bag to come out this month. I've already pre-ordered the pattern and all the associated parts. I'm going to make it out of the Fall Back in Time fabric line by Sandy Gervais for Moda. I will take pictures of the fabric and post later this week.
All quilters and sewers should definitely check out Joan's Lazy Girl Designs. I'm so glad I found her patterns. Her Lazy Girl Yahoo! Group is great as well. I love reading about other Lazies and what they are making.
Labels:
Quilting
Monday, September 17, 2007
Making Up for Lost Time
Howdy folks, long time no blog. Time seems to get away from me pretty often, and this was one of those times. Not only that, but I haven't been in a stampin' mood. (GASP!!)
The last couple weeks I finished up two cards I had started LAST year (LOL), the sketch from a few weeks ago (SC138), and the Limited Supplies Challenge from two weeks ago (LSC131). Better late than never...
The first card here is Sketch #92, a Halloween card, which I started last year and didn't finish before Halloween so I put it away until this year. This card uses scrapbook paper by Die Cuts with a View, Pumpkin Pie, Basic Black and Whisper White cardstock, and the pile o' jack-0-lanterns from the Halloween Smiles set by SU! I used markers to color in the image. I made 3 of these cards, and I have enough supplies to make one more. I just have to cut another striped panel...

The second card here (another card I started a while ago...) uses the polished stone technique and reverse embossing, just like this card I made here. I used Creamy Caramel, Chocolate Chip, and Whisper White cardstock, and the inks I used include Choco Chip, Creamy Caramel, and Close to Cocoa. The horse image is from the Brushstroke Horses set from SU! The tag is punched out using the Marvy Extra Jumbo Scallop Rectangle Punch, and stamped with the "friend" stamp from the Noteworthy set by SU! I used the direct to paper technique to add a distressed look to the caramel card base using caramel ink. The brown grosgrain ribbon is wrapped around the card front and the ends are tucked under the tag and antique bronze brads hold it down.

This next card is from Sketch #138, from a few weeks ago. I liked the sketch, and looking through my stamp sets I came across the Trick or Treat set from SU! and used the cat head. I've been dying to use this cat face for a while, and thought it would be cute with this sketch. I also used the striped scrapbook paper I used in the first card above! The cardstock is Pumpkin Pie, Basic Black and Whisper White, and I used Versafine Black inknk to get even coverage on the cat face, but it turned out kinda faded and looks kinda dark grey, which is fine with me.

The final card I have for you was for the Limited Supplies Challenge #131, which was to create an Autumn card, and I chose to do the 3rd challenge, the tent topper card. I used another polished stone/reverse embossing technique using one of the outline leaves from the Lovely Leaves set from SU! I used More Mustard, Pumpkin Pie, and Old Olive inks to do the polished stone technique, and punched out a circle using the Marvy Mega plain circle punch. I cut a circle slightly bigger in Whisper White using my Coluzzle companion template to mat. Finally, the Giga scallop circle punch was used to add the Old Olive scallop mat. The card base is Old Olive with direct to paper streaks using ColorBox chalk inks in autumn colors. I cut a strip of More Mustard and swiped it with More Mustard ink and stamped "Warm Wishes" from the Hugs and Wishes set by SU! in Old Olive. I added the antique gold brads to add a little somethin'.

WOW! Four cards in one post! I will try really hard not to be away so long again...
The last couple weeks I finished up two cards I had started LAST year (LOL), the sketch from a few weeks ago (SC138), and the Limited Supplies Challenge from two weeks ago (LSC131). Better late than never...
The first card here is Sketch #92, a Halloween card, which I started last year and didn't finish before Halloween so I put it away until this year. This card uses scrapbook paper by Die Cuts with a View, Pumpkin Pie, Basic Black and Whisper White cardstock, and the pile o' jack-0-lanterns from the Halloween Smiles set by SU! I used markers to color in the image. I made 3 of these cards, and I have enough supplies to make one more. I just have to cut another striped panel...
The second card here (another card I started a while ago...) uses the polished stone technique and reverse embossing, just like this card I made here. I used Creamy Caramel, Chocolate Chip, and Whisper White cardstock, and the inks I used include Choco Chip, Creamy Caramel, and Close to Cocoa. The horse image is from the Brushstroke Horses set from SU! The tag is punched out using the Marvy Extra Jumbo Scallop Rectangle Punch, and stamped with the "friend" stamp from the Noteworthy set by SU! I used the direct to paper technique to add a distressed look to the caramel card base using caramel ink. The brown grosgrain ribbon is wrapped around the card front and the ends are tucked under the tag and antique bronze brads hold it down.
This next card is from Sketch #138, from a few weeks ago. I liked the sketch, and looking through my stamp sets I came across the Trick or Treat set from SU! and used the cat head. I've been dying to use this cat face for a while, and thought it would be cute with this sketch. I also used the striped scrapbook paper I used in the first card above! The cardstock is Pumpkin Pie, Basic Black and Whisper White, and I used Versafine Black inknk to get even coverage on the cat face, but it turned out kinda faded and looks kinda dark grey, which is fine with me.
The final card I have for you was for the Limited Supplies Challenge #131, which was to create an Autumn card, and I chose to do the 3rd challenge, the tent topper card. I used another polished stone/reverse embossing technique using one of the outline leaves from the Lovely Leaves set from SU! I used More Mustard, Pumpkin Pie, and Old Olive inks to do the polished stone technique, and punched out a circle using the Marvy Mega plain circle punch. I cut a circle slightly bigger in Whisper White using my Coluzzle companion template to mat. Finally, the Giga scallop circle punch was used to add the Old Olive scallop mat. The card base is Old Olive with direct to paper streaks using ColorBox chalk inks in autumn colors. I cut a strip of More Mustard and swiped it with More Mustard ink and stamped "Warm Wishes" from the Hugs and Wishes set by SU! in Old Olive. I added the antique gold brads to add a little somethin'.
WOW! Four cards in one post! I will try really hard not to be away so long again...
Labels:
Card Designs
Wednesday, July 04, 2007
Mom's Birthday Card
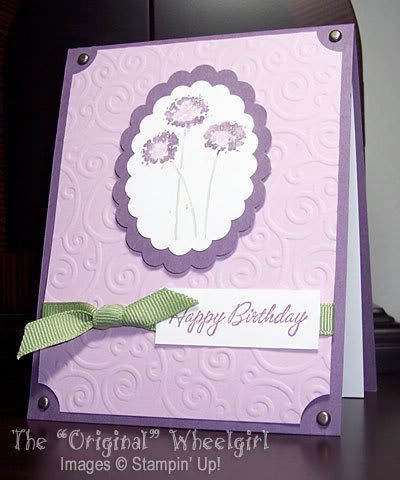
I made this for my Mom's birthday this year which was June 24th. I started to come down with a cold the Thursday before and hadn't made the card yet! I felt well enough to make this card Friday night, so when she came over Saturday the 23rd it was ready to give. But by then I was in the throws of a huge virus. YUK. I felt awful, not only from the cold, but also because I couldn't take her out to dinner for her birthday. She spent the day taking care of her sicko daughter. What a bummer, for both of us. I finally am well enough to post it.
I just love Perfect Plum, Pale Plum, and Mellow Moss together. I used the puffballs on a stick stamp from Happy Harmony, inked them up with the Perfect Plum, Pale Plum, and Mellow Moss markers, and stamped them on Whisper White cardstock. I punched it out using the Mega scallop oval punch, and mounted it on a Giga scallop oval punch in Perfect Plum. The background is Pale Plum, which was Cuttlebugged using the swirly texture plate from Fiskars. It is more subtle than the Cuttlebug folder. I ticket cornered it and tied moss grosgrain ribbon around it. The sentiment is from Warmest Regards in Perfect Plum, and attached on top of the ribbon. The focal image is attached with dimensionals. I added pewter brads to the corners to finish it off.
Labels:
Card Designs
Thursday, June 14, 2007
Chocolate Rose Thanks
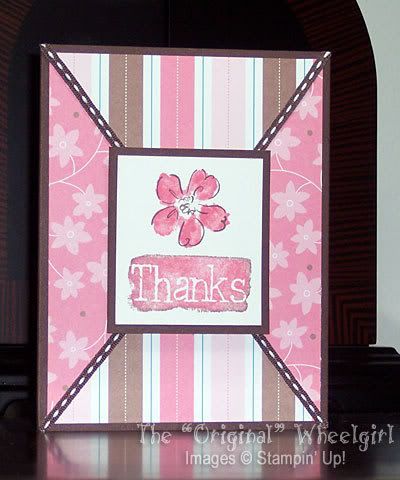
I just love pink and brown, don't you? I made this card for this week's sketch challenge. This is a very neat, easy to do sketch. I still have most of the papers from the Stampin' Up Loves Me designer paper collection (since I'm a hoarder), so I need to make some stuff from it. This was a great opportunity since you can use the double sided paper to make the putting the pieces together much easier.
I took a 4 inch by 5 1/4 inch piece of the designer paper and cut from corner to corner both ways. (Probably the hardest part of this was cutting the original rectangle, as I wanted the stripes to be going vertical, and the designer paper has the stripes going diagonally!!) Then I flipped the top and bottom triangles over to reveal the other side. I glued them down and attached the brown stitched ribbon from the Seaside collection of Ribbon Originals from SU. This covers any wonky seams. The center image is very simple, just the single flower image from the Heartfelt Thanks set by SU! stamped in Regal Rose, with the outline stamp in Chocolate Chip. I cannot do the two-step stamping with out my trusty Stamp-a-ma-jig, thank goodness for that tool. I stamped the Thanks image in Regal Rose after "rock and rolling" the stamp in Chocolate Chip. Trimmed and matted it in Chocolate Chip and mounted to the card front with dimensionals. How easy is that?
Labels:
Card Designs
Wednesday, June 13, 2007
Coral and Brown Reverse Emboss
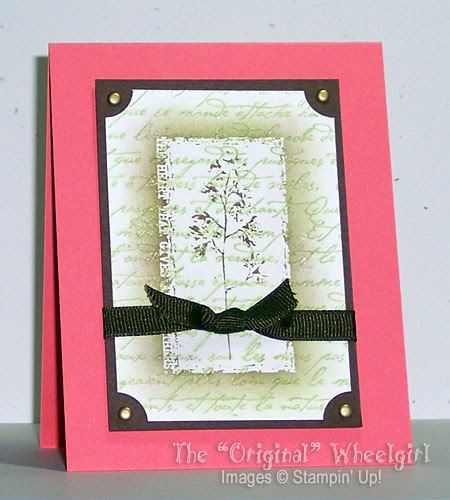
This card was inspired by a beautiful card made by Nichole Heady I saw on her blog, "Capture the Moment". Let's just say I'd like to capture her talent as well as her creativity! Nichole has a great tutorial for this technique of reverse embossing, and I just had to try it with my Reverse Prints hostess set by Stampin' Up. I used the colors from this weeks color challenge which calls for Cameo Coral, Certainly Celery, and Chocolate Chip, with an optional Tempting Turquoise. I opted OUT of the turquoise for this card...
I used the French Script background stamp in celery on Whisper White, and stamped the main image in Versamark, then clear embossed it. I sponged chocolate chip allover it to reveal the flower image and create a "halo effect" around the image. I then wiped off the excess ink and mounted it onto Chocolate Chip cardstock after I ticket cornered it. I added antique gold brads, tied a piece of brown grosgrain ribbon around and mounted onto a Cameo Coral card base using dimensionals. That's all there is to it! Thanks Nichole for the inspiration! You rock!
Labels:
Card Designs
Wednesday, June 06, 2007
Heartfelt Thank You and a New Obsession
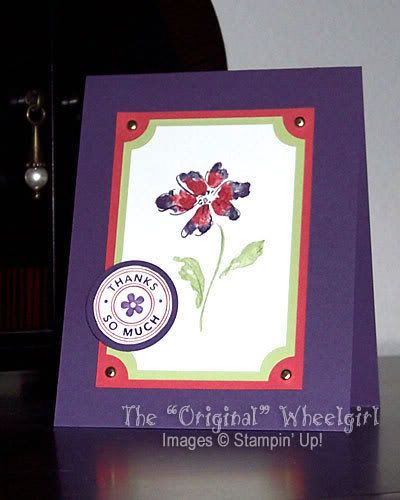
I made this card for this week's color challenge on Splitcoast. We were to use Elegant Eggplant, Ruby Red and Certainly Celery. I used the main flower image from the Heartfelt Thanks set by Stampin' Up, and colored it in with my eggplant, ruby, and celery markers. I stamped the outline over it in eggplant and always artichoke using my Stamp a ma jig. I used my ticket corner punch on the white and the celery cardstock, and mounted them on the ruby red cardstock. I added the gold brads and attached it to my eggplant card base with dimensionals.
For the circle accent, I used my markers to color in the Thank You Very Much stamp from the Riveting set by Stampin' Up, then cut just outside the line. I need to get the 1 1/4" circle punch, as it would have been MUCH easier. Then I mounted it onto a 1 3/8" eggplant circle, and attached with a dimensional. One more step would have made this perfect for the sketch challenge this week, except I couldn't figure out how to attach the strip across the center front without covering up most of the flower. Oh well.
Isn't it funny how you can stumble across a technique or design and you just get obsessed? This week's technique challenge was to make an origami shirt out of designer paper. Cambria Turnbow (a very talented lady I might add) has an excellent tutorial on her blog. The step by step pictures are very helpful. I've made several of them, although I have had yet to make a card using them. But aren't they adorable? Hopefully soon I can put them to use. Enjoy!
Labels:
Card Designs
Tuesday, June 05, 2007
Happiness Always
Sometimes being under pressure to get a card done can be a good thing. My best friend Patsy's anniversary is in a few days, and I just remembered today! Got to get a card made and made FAST! I had the idea to use the Happy Anniversary stamp from Favorite Greetings set by Stampin' Up!, but naturally I can't find that stamp! I must have used it a while back and didn't put it back, and my house is like a black hole sometimes.
As I was looking through my collection of stamps, I came across the Happy Harmony set, a Sell-a-bration set I hadn't used yet. EUREKA! There is a stamp in there which says "Happiness Always" which is what I wish for Patsy and her wonderful husband Tim.

For this card, I used a Rose Red card base, and the Palette O' Prints papers in Rose Red and So Saffron. I cannot wait for the new catalog, which will have these papers in 12x12 sheets in lots of colors, including the new In Colors! The designs are so yummy! I used the trio of flowers stamp from Happy Harmony, inking them with my markers in Rose Red, So Saffron, Regal Rose, and Mellow Moss and stamping on Whisper White Cardstock. I cut out the oval shape with my Coluzzle, and mounted it onto a scallop oval in Rose Red (Giga size). The image is attached to the card using dimensionals. I stamped Happiness Always in Rose Red on a scrap of WW and cut out using the Coluzzle. I sponged the edges lightly with Regal Rose, and attached using mono adhesive. The ribbon is from the Sweet Shop collection of the SU Ribbon Originals, and is attached with glue and trimmed at the sides of the card. It matches PERFECTLY!
Now let's just hope this card makes it to Atlanta by Saturday.
As I was looking through my collection of stamps, I came across the Happy Harmony set, a Sell-a-bration set I hadn't used yet. EUREKA! There is a stamp in there which says "Happiness Always" which is what I wish for Patsy and her wonderful husband Tim.
For this card, I used a Rose Red card base, and the Palette O' Prints papers in Rose Red and So Saffron. I cannot wait for the new catalog, which will have these papers in 12x12 sheets in lots of colors, including the new In Colors! The designs are so yummy! I used the trio of flowers stamp from Happy Harmony, inking them with my markers in Rose Red, So Saffron, Regal Rose, and Mellow Moss and stamping on Whisper White Cardstock. I cut out the oval shape with my Coluzzle, and mounted it onto a scallop oval in Rose Red (Giga size). The image is attached to the card using dimensionals. I stamped Happiness Always in Rose Red on a scrap of WW and cut out using the Coluzzle. I sponged the edges lightly with Regal Rose, and attached using mono adhesive. The ribbon is from the Sweet Shop collection of the SU Ribbon Originals, and is attached with glue and trimmed at the sides of the card. It matches PERFECTLY!
Now let's just hope this card makes it to Atlanta by Saturday.
Labels:
Card Designs
Monday, June 04, 2007
My "Assistant"
For the past few weeks I have been working at home, since we are remodeling the office building where I work. It has been very hard to stay focused on work, with TV, the internet, and the bed all calling my name. There is only another couple weeks to go, and I actually can't wait to go back to the office. I have been going in every couple days to get files to work on and get more work to do and review with my boss.

When ever I have a huge set of construction plans to look at, I lay them on my bed which is right behind me when I am at my computer. Unfortunately, Dexter comes along and spreads out on them. He doesn't realize he's not helping. But eventually he gets bored and leaves. Which is good because it is so hard to move him when he looks so happy and comfortable.
Thursday, May 24, 2007
Watermark!
As you noticed in my last post, I've got a watermark now! I'm not TOO worried about people stealing my images, since they're not as super fantastic as other bloggers out there, but I thought it would be cool to have one, and I can have copyright information for Stampin' Up images like I'm supposed to. I used Photoshop Elements 4.0 to create it, following the tutorial put together by Kurtis Amundson, otherwise known as Stampin' Kub. He's quite talented in all things stamping (puts me to shame big time). But of course why wouldn't he be, his mother's a Stampin' Up! demo!! His website is wonderful, and I am inspired everytime I visit. Take a look for yourself! His video on creating a watermark is in the Tutorial Section under "Tips".
Stampin' Kub
Stampin' Kub
Labels:
Blog related
Totally Cool Triangle Sketch
Sketch Challenge #124 over at Splitcoast was so interesting, I've made three so far. The first one I did was for my grandmother, but the picture was so awful I don't want to post it here, and since I don't have it anymore, I can't reshoot. But since then I have made two others that came out better anyway.
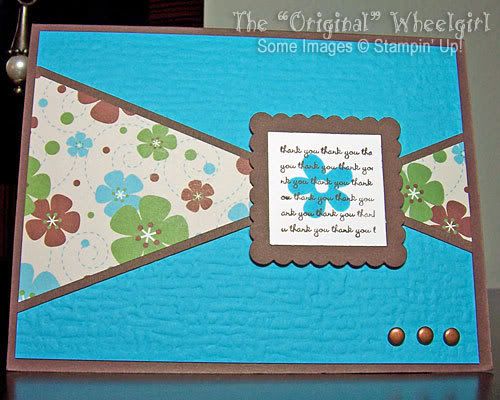
The best way to go about doing this sketch is to start with your scrapbook paper cut at 3 3/4" by 5". Flip it over to the back, and make a mark on one short end 1/2" from the top and from the bottom. On the other short end, make a mark 1 1/4" from the top and from the bottom. Connect the top mark on one side to the bottom mark on the other side, and do the opposite going the other way to make an X. Cut apart on these lines, and you have your two triangles! I matted these triangles 1/8th " on the two long sides of each triangle, with the short side flush. Then on a 4" x 5 1/4" panel I centered the triangles facing each other. There is a slight overlap which you could trim, but since you will be covering it with your focal image, it doesn't really matter. This panel is then attached to a regular size card base (4 1/4" x 5 1/2"). I hope this makes sense.
The card below was made using Tempting Turquoise and Chocolate Chip cardstock, to go with the scrapbook paper I got in the Die Cuts With A View 4x6 Retro pad. The turquoise panel is Cuttlebugged using the "fabric" Fiskars Texture Plate, and attached to a Choco Chip card base. The focal image is made using the flower and Thank You background stamps from the Mini Messages set by Stampin' Up! I used Tempting Turquoise ink for the flower and Chocolate Chip ink for the background Thank You's on Whisper White cardstock. I punched this image out using my 1 1/4" square punch and matted it with a Marvy Mega scallop square in Chocolate Chip. I attached the focal image using dimensionals. I just love this color combo!

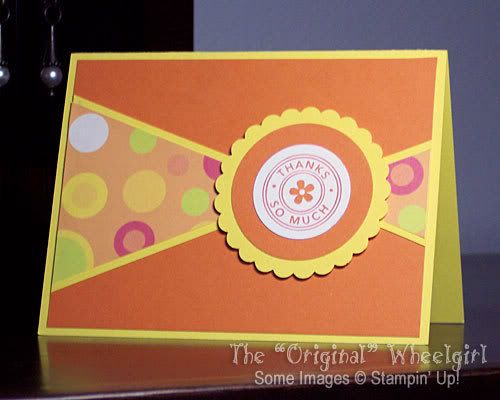
I liked this sketch so much that I made another card using the sketch and also for the Ways to Use It challenge for the week (WT114) which was to use of all things, YOYO YELLOW! Yuck! Not my bag, so I made it a secondary color for this card, which is mainly Pumpkin Pie! I stamped the Thanks So Much stamp from the Riveting set by Stampin' Up! in Pumpkin Pie on Whisper White cardstock and punched it out with the 1 3/8" circle punch, matted it with a Super Jumbo (blue Marvy punch) circle in Pumpkin Pie and again matted with a Mega Scallop Circle in Yoyo Yellow. The triangles are made using a downloaded digital scrapbook paper from Lettering Delights.com, matted in Yoyo Yellow and placed on a Pumpkin Pie panel and attached to a Yoyo Yellow cardbase. The circle focal image was attached with dimensionals. I probably would have added a touch of Certainly Celery cardstock, but I'm out and need to order more...

This won't be the last sketch like this I'll do, but I like this week's sketch too, so maybe I'll have to move on for a while...LOL!
The best way to go about doing this sketch is to start with your scrapbook paper cut at 3 3/4" by 5". Flip it over to the back, and make a mark on one short end 1/2" from the top and from the bottom. On the other short end, make a mark 1 1/4" from the top and from the bottom. Connect the top mark on one side to the bottom mark on the other side, and do the opposite going the other way to make an X. Cut apart on these lines, and you have your two triangles! I matted these triangles 1/8th " on the two long sides of each triangle, with the short side flush. Then on a 4" x 5 1/4" panel I centered the triangles facing each other. There is a slight overlap which you could trim, but since you will be covering it with your focal image, it doesn't really matter. This panel is then attached to a regular size card base (4 1/4" x 5 1/2"). I hope this makes sense.
The card below was made using Tempting Turquoise and Chocolate Chip cardstock, to go with the scrapbook paper I got in the Die Cuts With A View 4x6 Retro pad. The turquoise panel is Cuttlebugged using the "fabric" Fiskars Texture Plate, and attached to a Choco Chip card base. The focal image is made using the flower and Thank You background stamps from the Mini Messages set by Stampin' Up! I used Tempting Turquoise ink for the flower and Chocolate Chip ink for the background Thank You's on Whisper White cardstock. I punched this image out using my 1 1/4" square punch and matted it with a Marvy Mega scallop square in Chocolate Chip. I attached the focal image using dimensionals. I just love this color combo!
I liked this sketch so much that I made another card using the sketch and also for the Ways to Use It challenge for the week (WT114) which was to use of all things, YOYO YELLOW! Yuck! Not my bag, so I made it a secondary color for this card, which is mainly Pumpkin Pie! I stamped the Thanks So Much stamp from the Riveting set by Stampin' Up! in Pumpkin Pie on Whisper White cardstock and punched it out with the 1 3/8" circle punch, matted it with a Super Jumbo (blue Marvy punch) circle in Pumpkin Pie and again matted with a Mega Scallop Circle in Yoyo Yellow. The triangles are made using a downloaded digital scrapbook paper from Lettering Delights.com, matted in Yoyo Yellow and placed on a Pumpkin Pie panel and attached to a Yoyo Yellow cardbase. The circle focal image was attached with dimensionals. I probably would have added a touch of Certainly Celery cardstock, but I'm out and need to order more...
This won't be the last sketch like this I'll do, but I like this week's sketch too, so maybe I'll have to move on for a while...LOL!
Labels:
Card Designs
Tuesday, May 15, 2007
Winter Fluffles
I know its spring, and really close to summer, but I chose to do a January themed card for the Year of Fluffles swap being held on Splitcoast, since it was the last spot open in the swap. I used the Snowboard Fluffles stamp, and also the Winter stamp from the Season by Season set by Stampin Up! I colored him in with So Saffron, Brocade Blue, and Bashful Blue markers, and used Julie Buhler's technique for making a scalloped circle using the small corner rounder and Night of Navy cardstock. (Julie, I hope you don't mind me linking to your website. I'm a huge fan!)
For the background I ran Brocade Blue cardstock through my Cuttlebug using the Fiskars snowflake texture plate and notched the corners with the ticket corner punch. I stamped "Winter" on a scrap of white, and scraped the edges on the Night of Navy pad to define the edges. I glued a piece of navy grosgrain around the background piece and attached the Winter piece with glue dots and added a special brad. I attached the Fluffles focal image using pop dots for dimension. I used Sticky Strip to attach the whole thing to a Night of Navy card base because the embossed background needed extra hold. And thats about it. Oh by the way, I made twelve of these...WHEW!
Labels:
Card Designs
Sunday, May 13, 2007
Happy Mother's Day!
Happy Mother's Day to all the moms out there! This year I gave my mom a gold bangle bracelet, and I made a gift bag out of Certainly Celery cardstock using the pattern that was in PaperCrafts magazine a while back and was also Technique Challenge #102. The center panel uses one of the green papers from the Palette O' Prints pack available now from Stampin' Up. I used brown grosgrain ribbon I got at Michael's for the handles and attached it with Sticky Strip to make sure it stuck. The bag was also put together with the same sticky tape. I was happy to see I had matching green brads to add to the top of the bag on the ribbon! I made a matching card using the same colors and paper and the Sketch Challenge 105 (one of my favorites!), with a bit of Chocolate Chip cardstock for the matting. I used the Happy Mother's Day stamp from All Year Cheer II (too bad its retiring) in Chocolate Chip ink on Whisper White cardstock and punched it out with my Mega scallop oval punch and matted it in Chocolate Chip with the Giga scallop oval. Mom was thrilled!
Labels:
Card Designs
Subscribe to:
Posts (Atom)