Monday, June 23, 2008

Dandelion Girl Gracie

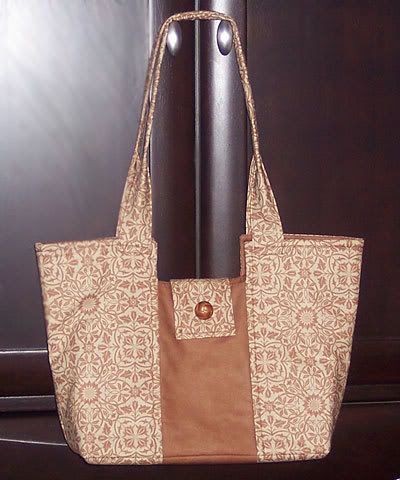
Haven't been in the sewing room much lately, but for my mom's birthday this year I wanted to make her another Gracie bag (from the AWESOME Lazy Girl Designs pattern) out of the lovely Dandelion Girl fabric line from Moda. I used the brown color way and the cool patterned fabric and solid that matches. Found a cool button at Joann's that matched pretty close. I love this pattern so much. It really whips together fast.


Dexter must ALWAYS inspect any bag, quilt or other project before giving, so here's a shot of him with the inside of the bag...he's a ham.


Must mention that I used the Velcro Fusion again. LOVE THIS PRODUCT! Also, after I attached the flap, I realized I hadn't topstitched around it! So instead of frog-stitching (rippit rippit) I somehow was able to topstitch it by pulling it away from the rest of the bag as best I could. Luckily it worked out! I have some scraps left over of both fabrics and hope to make something else, probably a Wonder Wallet! Thanks for stopping by!

Sunday, June 22, 2008

Mom's Birthday Card 2008

Here is the card I made for my mom's birthday this year. I used Splitcoast's Color Combo #171 which is Soft Sky (retiring), Kraft and Black. I love Soft Sky and Black. I also love Soft Sky and Chocolate. I'm sorry to see Soft Sky go, but I believe one of the new In Colors is a close match, maybe a bit darker.


I used the Embrace Life stamp set for this card, and also the Happy Birthday stamp from the Warmest Regards set. Once again I tried my hand at watercoloring using Soft Sky ink from the pad and a waterbrush for the focal image (stamped in black Stazon, matted in Kraft and Black cardstock, and attached with dimensionals). The background is stamped on the Soft Sky cardstock in the same ink, with a piece of Soft Sky double stitched ribbon tied around it and attached to a Kraft card base. Thanks for looking!

Thursday, May 22, 2008

New Signature On My Blog!

I've been blog hopping and noticed that some of my favorite bloggers have a signature that looks like it was handwritten. I clicked on one of the signatures and it took me to MyLiveSignature where I could create my own signature to add to my blog posts. I don't really like my handwriting so I chose Font #67 and used the wizard to create my sig. I like it! Anyone looking to create a handwritten look to their signature should check this site out. It's free.

Sunday, May 18, 2008

Dexter says, "Vote Republican!"

Today mom and I went to Target and were down the cat food/toy aisle and I saw these adorable hats for cats...


He doesn't look too happy here...so needless to say we took it off (Im not THAT cruel...lol).


Anyway, we also got him a scratch pad which was covered in catnip, which he ate some of. Dexter doesn't go nuts on the nip, but he does drool (see photo below for evidence) and rubs his face on it.


He pulled the scratch pad out of the box by turning it over, and all the catnip fell out onto the tile. Mom was like, "BONANZA!" She quickly swept it up before Dex OD'd.

Anyway, hope to have some photos this week of projects and stuff. I've been out of it for a while. Thanks for stoppin' by!

Thursday, April 17, 2008

Color Inspiration #5 from Kristina Werner

My mom and I are huge fans of Kristina Werner. She has on her blog every week a Color Inspiration where she takes pictures (usually of home decor items) from magazines and converts the colors to Stampin' Up colors, giving us a color combo to work with. This week the colors are Close to Cocoa, So Saffron, Certainly Celery, and Bashful Blue. Here is my card for this combo:


For this card I pulled out a set I've had for a LONG time but never inked up. I have a lot of those sets...(sigh). It is called Sheltering Tree. I stamped the leaves in Certainly Celery and then the trunk in Close to Cocoa (using the stamp-a-ma-jig to get things lined up YAY!). I used the little flower stamp in Bashful Blue in the spaces provided and scribbled some grass at the tree base with my celery marker. I trimmed this image down, matted it in So Saffron, and again in Celery.

I made a Bashful Blue card base and tied a piece of striped ribbon around the front. This ribbon AMAZINGLY had every color except cocoa...couldn't have planned it better. It came from an old Ribbon Originals collection called Seaside. I stamped Thinking of You from the Warmest Regards set in Close to Cocoa at the bottom right and then placed the tree image above it with dimensionals. Thanks for having a look, and thanks to Kristina for the inspiration!

Sunday, March 23, 2008

I Can Has Cheezburger?

I love this website! If you like cats (and other animals) you will too. People take interesting pictures of animals and then caption them. For example, this one:

funny pictures
see more crazy cat pics

I've got it bookmarked and am going to check it everyday for a laugh!

Sunday, March 16, 2008

With Sympathy Card for Nancy

I hadn't had the need to make a sympathy card since I started my card-making hobby, until recently when the husband of my friend Nancy passed away from cancer. I made this card a couple weeks ago.


It's a simple design, using Mellow Moss and Basic Black, with the fern stamp from the Stem Silhouettes set by Stampin' Up! stamped in Mellow Moss on Whisper White. I tied black gingham ribbon around the focal image and attached it with dimensionals. The sentiment is from the Warmest Regards set stamped in Black Stazon ink.

I pray that Nancy and her family and close friends find comfort during this time. I never got to meet her husband Jacques but have been told that he was a joy to be around. God bless him and his family and friends!

Grandma's 90th Birthday!

Here is the third card in my Sketch 155 series, this time in Perfect Plum and Pale Plum with shiny silver brads. I made this tonight for my Grandma's 90th birthday on Thursday. I think I'm done with these cards for now...lol!


One cool new thing I tried for this card is dyeing white grosgrain ribbon! I used my Perfect Plum reinker so that it would match the cardstock, since we don't sell Plum grosgrain ribbon (too bad it's one of my favorite colors in our collection). It wasn't too bad, kept my fingers clean by swirling it around in the ink/water mixture with a paintbrush. Hope you like!

First Wonder Wallet!

Back in the sewing room once again...it has been too long. I've been either sick, tired or too busy to get in there! But today I was all alone since Mom is expecting her brother and my cousin to come into town this evening to visit for my Grandma's 90th birthday on Thursday, and they are staying with her, so she wanted to be there to do some last minute cleanup of her house. So she came over Friday instead of the usual Saturday to help me out and left last night. Free Sunday! But I would rather she be here...

I've had the Wonder Wallet pattern by Joan Hawley (the Lazy Girl Designs DIVA!) for some time but it has intimidated me. Lish over at 25 Weeks Yahoo! group had as one of the February goals to make six (!!) of these things. Well needless to say I didnt meet that goal...I'm just now getting around to the first! Sigh.


They are pretty quick to make, and this first one I used leftover scraps from my Miranda Bag (see this post) to whip it up. Unfortunately I only had a 3 inch strip of the cool stripe fabric, and the pattern calls for larger strips than that. So I only used the floral print and the green leafy print. I had trouble with the bulk, and my velcro doesn't line up! Next time I will save the velcro on the cover until last, since I used the fusible velcro, which totally rules!


Maybe the next one will be even easier since I've got the steps down pretty well. It is so cute! I also plan on making a matching tissue holder since I have just enough of the pretty focal floral print left. Five more wallets to go...

Monday, March 10, 2008

I Cased Myself!

I was so happy with the way that my friend Carmela's birthday card came out I decided to repeat the joy for my best friend Patsy's 35th birthday which is this coming Saturday. The only difference is that instead of Pretty in Pink and Chocolate Chip I used Soft Sky and Basic Black (all colors from Stampin' Up!). Plus the ribbon is the narrow black gingham ribbon from SU!.


I love it when a plan comes together...Happy Birthday Pats! You'll always be older than me...heheehehe!

My grandma's 90th birthday is March 20th, and I'm thinking of this same card design in Pale Plum and Perfect Plum! I think it will be GORGEOUS so look for that in the next few days.

Friday, February 15, 2008

Valentine's 2008

Hope everyone had a nice Valentine's Day. As a single girl, I normally try to ignore the day...lol! This year, however, I made a couple cards, one for my mom and one for her friend Reno using the Happy Heart Day stamp set from Stampin' Up. I didn't mean to, but I ended up making these at the last minute on Monday, as I had to drop them in the mail Tuesday to make sure they got to their recipients in time!!


This is the card I made for my mom. I started with a card base of Pretty in Pink cut at 4 1/4 by 11 and scored at 5 1/2 inches. The Rose Red layer is ticket cornered and the flower image was randomly stamped all over in Regal Rose, and attached to the card base with adhesive. The scallop circle was cut from Pretty in Pink cardstock using the Nestabilities die cuts and my Cuttlebug and was also embossed using the Fiskars texture plates. I sponged a bit of Regal Rose ink over the embossing, and attached to the card with adhesive. I used the little mouse image with Black Stazon ink on Whisper White cardstock. I tried my hand at watercoloring with markers and a paintbrush. I have got to get me a aquapainter or waterbrush, to avoid the cup of water mess (my cat's obsession with water again...). The colors I used are Pretty in Pink, Regal Rose, and Rose Red, with a bit of Going Gray. I matted the mouse image in Pretty in Pink and then again in Regal Rose cardstock. The Regal Rose layer was distressed with the distressing tool. The mouse focal image was then attached to the card with dimensionals. The final touch is silver brads in each corner.


Here is Reno's card. I cut a piece of Pretty in Pink cardstock 3x6 inches and scored at 3 inches to make a 3x3 square card. I cut a piece of Regal Rose card stock 2 3/4 inches square and stamped the flower image all over in Regal Rose ink. I wrapped a piece of sheer pink plaid ribbon I had in my stash around it and attached to the card base using adhesive. I stamped the Happy Valentine's Day tag image in Black Stazon ink on Whisper White, and watercolored it using Pretty in Pink, Regal Rose, and Rose Red markers. I punched out the image using the small tag punch from Stampin' Up and matted it with Rose Red using the large tag punch. I attached a piece of pink grosgrain ribbon with a silver brad and then attached the tag image with dimensionals in the center of the card front. I love these little cards!

I got a Valentine from Mom, but she gave it to me early when she came over last weekend. She's caught the cardmaking bug too! Thanks for stopping by!

Friday, February 08, 2008

Shower Time

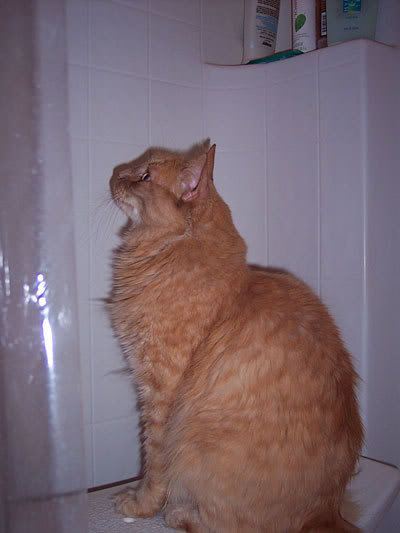
No this is not an x-rated post...lol. My fluffball Dexter loves to get in the shower and I thought I would snap a shot of him (with out me...yikes the thought!) sitting on my bath seat.


He is so funny, always comes running when he hears the water come on. Not sure exactly why, I thought cats HATE water! Not that he enjoys being drenched, but he doesn't mind a little spritzing on his face. He likes licking the water off the shower floor and the seat, and my leg when I'm in the shower. Gosh I hope my cat's not a perv. LOL!

Wednesday, February 06, 2008

Reno's Birthday 2008


This card was made for my Mom's bud Reno's birthday. I think the dahlia flower challenge on Splitcoast is definitely one of my favorite challenges. I used the Fall Flowers designer paper, Soft Sky and Really Rust cardstock. The sentiment didn't exactly turn out how I had hoped, I stamped "CELEBRATE" from the Celebrate Everything stamp set (Stampin' UP!) in Soft Sky ink and then overstamped it in New Canvas Palette Ink. It was supposed to be a drop shadow but I dont think I inked up the stamp enough in the white ink. The picture doesn't show it well. What is cool is in real life it almost is holographic. Maybe I will try that again some other time. But the flower is AWESOME...thanks for stopping by!

Sunday, February 03, 2008

Patti's Birthday Present 2008

This Friday was my great friend Patti's birthday. I don't usually know what to get her, and she would rather people not make a huge deal about her birthday. But I decided to make her something this year. She likes wolves, and I found a beautiful embroidery design of a wolf over at Embroidery Library. I used the concept of Joan Hawley's (Lazy Girl Designs) Perfect Pouches pattern to make a small pouch to put whatever in. It is about 8 inches square, and is made from a velvety corduroy I picked up at A.C. Moore.


I used fusible no show nylon mesh as a stablizer for the embroidery, and used the hoopless method to do the stitchout, as I was afraid of hoop burn (marks on the nap of the corduroy). However, I just used a simple tearaway and spray adhesive, and the denseness of the design caused the tearaway to rip away and there was serious puckering. But when I cutaway most of the mesh stablizer the puckers lessened and weren't as noticible once the pouch was assembled. Next time I will use a cutaway stablizer and really stick the fabric to it and baste it in place, so it won't pull away. All in all it was a beautiful stitchout and Patti was happy. She likes handmade items because she realizes the thought and feeling that goes into making something for someone. How nice!

I really like the simplicity of the Perfect Pouch pattern. The zipper installation method is ingenious! And you can make them any size you want. That's the best part!

Thursday, January 10, 2008

Valentine's Day

I've been seeing a bunch of Valentine's Day cards on Splitcoast and various blogs I frequent. I just love the 3x3 inch card size for valentines, and was inspired by Kristina Werner's blog recently to make one.


This card is made from Real Red cardstock, cut at 3 inches by 6 inches and scored at the 3 inch mark on my Scor-Pal (love that tool) and folded to make a 3x3 card. I then punched a Giga scallop square in Whisper White. The embossed red layer (1 and 7/8 inches square) was done by using my Cuttlebug with the heart texture plate from Fiskars. It turned out so cute! I then stamped the For You With Love stamp from the Riveting set by Stampin' Up! in Real Red classic ink and punched it out with the 1 and 1/4 inch circle punch. The three layers were adhered together with adhesive, and the whole thing was attached to the card base with dimensionals. Finally, I tied a piece of red gingham ribbon from American Crafts around the card front using Kristina's method. Simple and cute, and QUICK! Thanks for peeking in...

Sunday, January 06, 2008

Tissue Holders - Complete!

As I spoke about in my last post, I have joined the 25 Weeks of Christmas Yahoo! group. Our project goal for this month is to make at least six travel tissue covers. Well, we have several patterns to choose from, all different dimensions. I picked one last week which turned out to be too big, because the pocket tissues I bought were a different brand that what the pattern designer used, and the tissues were SWIMMING inside...and I made THREE before I learned this lesson. Sigh. Here are the tissues I bought:


Well, this week I ripped apart the tissue holders I made because I really liked the fabric I used and since I was downsizing I could still use it. I am not going to post how I did it because there are numerous directions out there on the web. The pattern directions I followed were from Tracy at sewthankful.com, but I started with a rectangle six inches by seven and a half inches, and next time I make these will start with a six by seven inch rectangle, because my resulting cover is still a bit loose. Here is a finished tissue cover:


These were very fun and easy to make. I made six very quickly this evening, in under a couple of hours. I love assembly line sewing. It seems to make things go faster. I probably will make more someday, they are quick and easy gifts to make. Two fat quarters will make six covers and there are so many options with patchwork, embroidery, etc. Here are the six completed covers, with tissue packs inside. Thanks for looking!

Tuesday, January 01, 2008

25 Weeks of Christmas

Happy New Year everyone! Hope that 2008 is a safe and happy one for all. As I said in my last post, I didn't make gifts for people this year, mostly because I procrastinated until it was just too late to start. Well this year I hope will be different. I recently signed up for a new Yahoo! group called 25 Weeks of Christmas, which a fellow Lazy Girl group member (Lish) created. It is a group designed to help support and encourage its members to get their gifts made and wrapped by December so that we can enjoy the holidays with less stress! Participation is required as there is a no lurking policy. We have small goals to meet each month (little projects etc), and by July we are ready to get our gifts we plan to give going. I'm excited because it will give me the little nudge I need to get my butt in gear.


I found a box in my sewing room that will hold the projects in it when completed (actually it is temporary because it is rather small, will upsize when the time comes). Dexter decided he would inspect the box to make sure it was appropriate. I guess he approves!


Well, wish me luck, as I have big plans to give lots of Lazy Girl bags this year! I spent five hours Friday night in my sewing room cleaning up and trying to organize, and found FOUR packages of Warm and White cotton batting (craft and baby size)...and I almost bought some last week! Just goes to show you "out of sight, out of mind" really is true. I also found lots of fabric I bought over the last year that I completely forgot about...sigh. It still looks pretty awful in there, I need CLEAN SWEEP to come in...oh wait, they make you throw out half of everything...never mind (lol)

I'm off today from work, and am getting ready to go back in the sewing room to attack the mess again. Again, Happy New Year!

Thursday, December 27, 2007

Reno's Christmas 2007 Sweatshirt

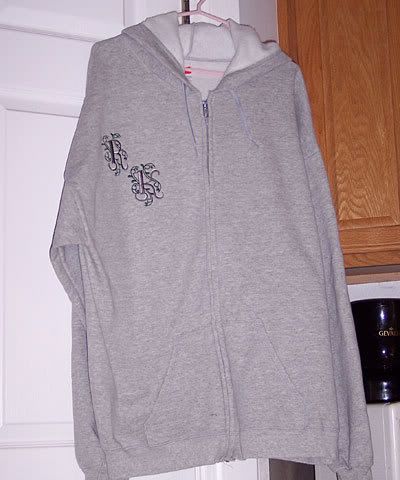
I didn't make too many gifts this year, not for a lack of wanting to, but just lack of time and energy. But my mom bought this zip up hooded sweatshirt at Target for her friend Reno a couple weeks ago, and I had an idea to embroider his initials on it.


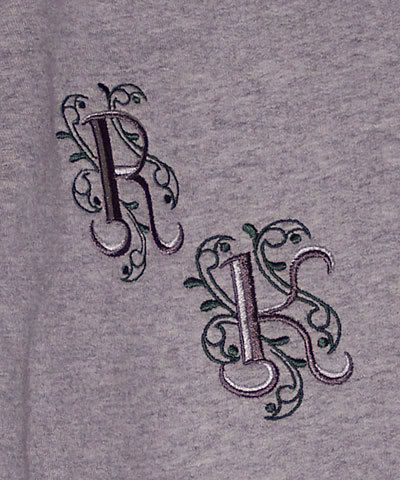
That night I got online and downloaded his initials from Embroidery Library out of the Ornate Alphabet collection. I first imported the 3 inch letters into my embroidery software and arranged them in a pleasing manner, then combined them into one file. I changed the colors to silver and green to go with the heather gray fabric. My mom helped me with the prep work (stabilizing and hooping the sweatshirt) and then we watched my Viking Designer SE (my dream machine) stitch out the R and the K. It turned out great. Here is a close up of the initials:


Reno's "initial" reaction was to laugh! What a strange response...lol but thats RENO! He did like it, and I think it made the plain sweatshirt much nicer.

Wednesday, December 26, 2007

For Carmela

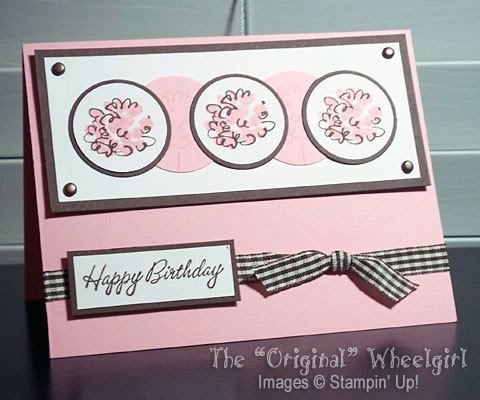
I just loved this sketch when I saw it on Splitcoast last week, but with Christmas and all I hadn't got a chance to make it. I had a great idea one morning this weekend as I lay in bed (contemplating whether to get up or not...lol) to make a pink and brown birthday card for my late brother's high school and beyond girlfriend (who is now married and has a baby boy). Greg died ten years ago, but we still keep in touch with Carmela because she meant so much to him. She's like a sister to me. Her birthday is on New Year's Eve, and I hope she likes the card.


I used the puffball on a stick stamp from the Heartfelt Thanks set by SU! and Happy Birthday from the Warmest Regards set. The colors are Pretty in Pink, Chocolate Chip and Whisper White. I found some brown gingham ribbon and added some copper brads which are as close to brown as I could get. The circle punches I used are the 1 - 3/8 and 1 - 1/4 ones. I also used my Perfect Layers tool to get a 1/16 mat on the sentiment. Pretty sweet tool. Both the focal panel and sentiment are attached with SU dimensionals. Thanks for looking!

Sunday, December 09, 2007

My First Miranda Bag!


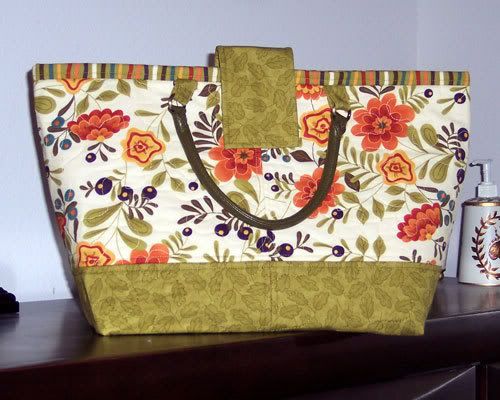
Well it took me a while only because I haven't felt like going in the sewing room for some time, but I finally finished my first Miranda bag!! It is much more involved than the Gracie bag (also by Lazy Girl Designs) but is still a simple to make bag. I used fabric from Moda's Fall Back in Time line by Sandy Gervais. I love how the striped fabric I used for the inside of the bag forms the faux binding at the top. I used the dark green vinyl handles by Exclusively You by Leisure Arts, which are a bit darker than I would like, but I think it still looks good.


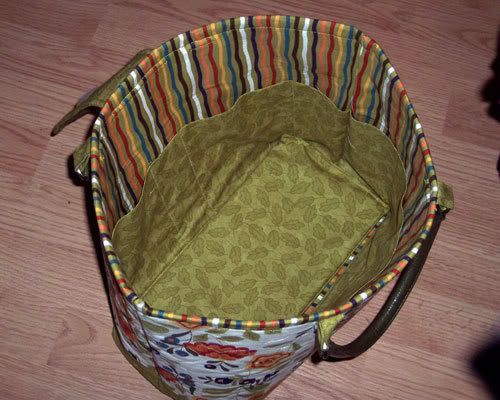
Don't you just love all these cool pockets? So much organization in such a small package, although this bag turned out way larger than I expected. That is fine with me, the more room the better! This bag is super sturdy, because it uses heavy interfacing (I used Decor Bond) on both the bag and the lining. It made for some difficult turning of the bag, but once that was done, it was cake.

I love this design and will surely make another. But who knows when? I just have to find the time and pick out some new fabrics! There are so many new lines out now, and I am drooling over some of them!! Thanks for looking!